Installing landscape lighting can transform your outdoor space, making it more inviting, safer, and highlighting key architectural or natural features. This guide will help you understand the basics of installing landscape lighting correctly.
Step 1: Plan Your Layout
Understanding Your Space
- Assess Your Yard: Walk around your property during the day and at night to understand which areas need lighting for safety, security, and aesthetics.
- Identify Key Features: Note features like trees, garden paths, architectural details, water features, or statues that you want to highlight.
- Functional vs. Decorative Lighting: Consider what areas need functional lighting for safety, like walkways and entrances, and where you might want decorative lighting for ambiance.
Designing Your Lighting Plan
- Create a Diagram: Draw a rough sketch of your yard, marking where you want each light. This helps in visualizing the overall effect and planning the wiring layout.
- Choose Lighting Styles: Decide on the types of lights for each area – path lights, spotlights, floodlights, step lights, etc.
- Consider Light Direction: Plan how each light will illuminate its intended area, considering aspects like beam spread and intensity.
Planning for Power
- Decide on Power Sources: Will you use low-voltage, solar, or a mix? This affects the placement and type of lights you can use.
- Estimate Cable Length: Based on your diagram, estimate how much cable you’ll need, considering the most efficient routing.
Step 2: Choose the Right Lights
Selecting Fixtures
- Match Your Home’s Style: Choose fixtures that complement your home’s architecture and landscape design.
- Quality and Durability: Opt for high-quality, weather-resistant materials like stainless steel, copper, or powder-coated aluminum.
- LED for Efficiency: LEDs are more energy-efficient and have a longer lifespan than traditional bulbs.
Understanding Brightness and Color
- Lumen Output: Consider the lumen output (brightness) of each light, ensuring it’s appropriate for its intended purpose.
- Color Temperature: Warm white (around 2700K-3000K) is usually pleasing for homes, but cooler temperatures may be suitable for highlighting certain features.
Environmental Considerations
- Solar Options: If you’re considering solar lights, ensure that they will receive enough sunlight during the day to charge.
- Wildlife Friendly: In areas with wildlife, consider using lights that don’t disturb nocturnal animals, like low-intensity, warm-colored lighting.
Step 3: Electrical Considerations
Understanding Low-Voltage Systems
- Transformer Needs: For low-voltage systems, you’ll need a transformer to convert your home’s standard voltage to a lower, safer level. Ensure it has enough capacity to handle your total wattage.
- Circuit Planning: Plan your circuits to avoid overloading. Group lights logically, balancing the load across multiple circuits if necessary.
Wiring Considerations
- Cable Type and Gauge: Choose the appropriate gauge of cable for your system. Thicker cables (lower gauge numbers) can carry more wattage over longer distances.
- Safe Cable Routing: Plan a safe route for cables, avoiding areas where they could be damaged. Consider using conduit for extra protection.
Working with Electricity
- Safety First: Always turn off power at the main breaker box when working with electrical wiring.
- Following Codes and Regulations: Familiarize yourself with local electrical codes and standards, or consider hiring a licensed electrician for complex installations.
Step 4: Careful and Correct Installation of Landscape Lighting
Preparing for Installation
- Gather Tools and Materials: Ensure you have all necessary tools and materials like cables, fixtures, a trenching shovel, wire strippers, connectors, and a drill if needed.
- Safety First: Always begin by turning off the power at the main breaker to avoid any electrical hazards.
Laying Out the Fixtures
- Placement According to Plan: Place each light fixture at its designated spot according to your layout plan.
- Consider Future Changes: Think about how future landscaping changes might affect your lighting and leave some flexibility for adjustments.
Burying the Cables
- Depth Requirements: For areas away from foot traffic, bury cables at least six inches deep. In high-traffic areas or under driveways, bury cables at least 12 inches deep or as per local regulations.
- Protective Measures: Use conduit or protective casing for extra protection, especially where cables cross under pathways or driveways.
- Avoiding Cable Damage: Be cautious while digging to avoid damaging underground utilities. It’s advisable to call a utility locator service before you start digging.
Connecting the Lights
- Wiring Connections: Carefully connect the wires from the light fixtures to the main cable. Use weatherproof wire connectors to ensure a secure and moisture-resistant connection.
- Following Manufacturer’s Instructions: Always follow the manufacturer’s instructions for each light fixture to avoid any mistakes in wiring or assembly.
Installing the Transformer
- Choosing the Location: Install the transformer near a GFCI (Ground Fault Circuit Interrupter) outlet and preferably close to your home for easy access.
- Mounting and Connections: Securely mount the transformer and connect the main cable from your light fixtures to it. Ensure all connections are tight and secure.
Testing Before Final Burying
- Initial Testing: Before burying the cables, temporarily connect the lights to the transformer and test them to ensure they all work and are positioned correctly.
- Adjustments if Necessary: Make any necessary adjustments to light positions or connections at this stage.
Finalizing the Installation
- Burying the Cables: Once you’re satisfied with the layout and connections, bury the cables at the appropriate depth, and backfill the trenches.
- Securing the Fixtures: Firmly secure each light fixture in its place. If necessary, use stakes or mounting hardware to ensure stability.
Clean Up and Restoration
- Restoring the Landscape: After installation, restore your landscape. This might include reseeding grass areas, repairing any disruptions, and cleaning up all tools and debris.
Step 4 Summary
This step is all about meticulous execution. Proper installation ensures longevity, safety, and the desired aesthetic of your landscape lighting. Take your time to do it right, and if any part of the process seems beyond your expertise, don’t hesitate to consult with or hire a professional.
Step 5: Fine-Tuning Your Landscape Lighting
Adjusting Light Placement and Angle
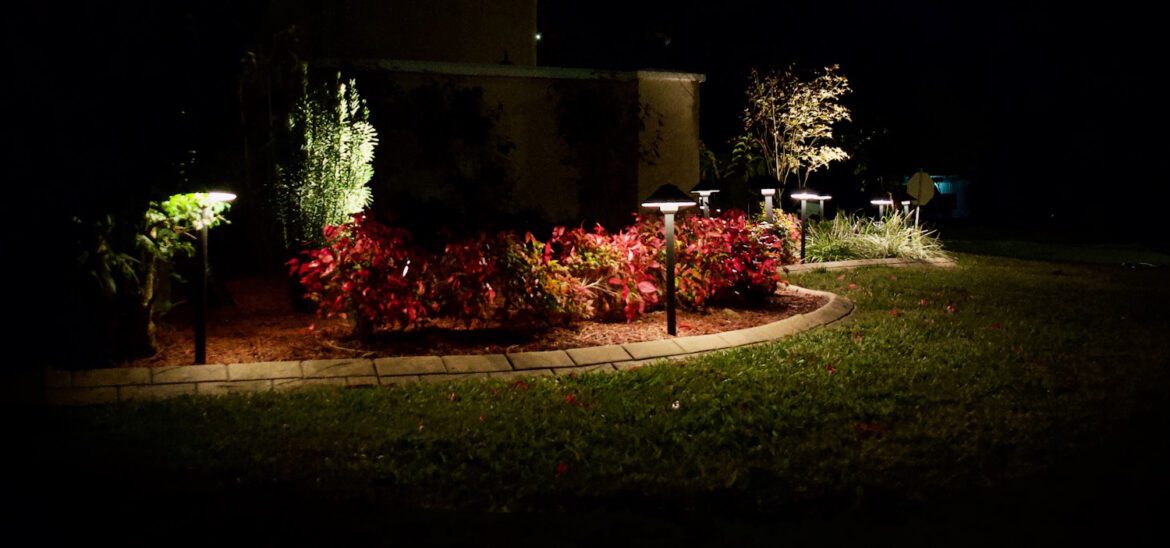
- Spotlight Positioning: Aim your spotlights to highlight key features like trees, sculptures, or architectural details. Adjust the angle to avoid light shining directly into windows or onto neighboring properties.
- Path Lighting Balance: Ensure path lights are evenly spaced to create a welcoming and safe walkway. Avoid the “runway” look by varying distances slightly or using staggered placement.
- Shadow and Silhouette Play: Experiment with backlighting or side-lighting to create dramatic shadows or silhouettes, adding depth and interest to your landscape.
Intensity and Brightness Adjustments
- Dimming for Ambiance: If your system allows, adjust the brightness of certain lights to create ambiance or highlight specific areas. Dimmer lights can be used for a softer effect in lounging areas.
- Avoiding Light Pollution: Be mindful of light pollution. Direct lights downward and use shields to prevent light from spilling into the sky or across property lines.
Color Temperature and Color Coordination
- Harmonizing Color Temperatures: Ensure the color temperatures of your lights are consistent or intentionally varied. For example, use warmer lights for relaxation areas and cooler lights for functional areas like driveways.
- Using Colored Lighting: While white light is standard, consider subtle colored lighting for special accents or to complement your landscape’s color scheme.
Testing and Observing
- Evening Walk-Through: After sunset, walk around your property to observe how the lights perform. Look for dark spots that need additional lighting or areas where the lighting is too intense.
- View from Inside and Outside: Check how the lighting looks from inside your home as well. It should enhance the view from your windows without being overpowering.
- Neighbor’s Perspective: Consider how your lighting affects your neighbors. Ensure that your lights do not intrude into their space or cause any disturbance.
Fine-Tuning Over Time
- Seasonal Adjustments: Be prepared to adjust your lighting with the changing seasons. Plants grow and landscapes change, which might require you to reposition or redirect some lights.
- Regular Maintenance Checks: Periodically check and clean your light fixtures. Dirt and debris can affect the intensity and direction of the light.
Final Touches
- Adding or Removing Lights: Based on your observations, you might need to add more lights to certain areas or remove excess lighting where it’s not necessary.
- Consultation with a Professional: If you’re unsure about any adjustments or need expert advice, don’t hesitate to consult with a landscape lighting professional.
By carefully adjusting and testing your landscape lighting, you can ensure that your outdoor space is beautifully and effectively illuminated, enhancing the safety, functionality, and aesthetics of your property.
Step 6: Maintenance
Regularly clean the light fixtures, and replace any burned-out bulbs. Check the wires periodically for damage, especially after severe weather. For solar lights, keep the solar panels clean for optimal performance.
Final Thoughts
Installing landscape lighting can be a rewarding DIY project that enhances the beauty and functionality of your outdoor space. If you’re unsure about any part of the process, consult with a professional. With the right planning and execution, you can enjoy a beautifully lit landscape for years to come.
Remember, safety is paramount. Always follow local electrical codes and consider consulting a professional for complex installations. With these steps, your landscape lighting project can illuminate your outdoor space, providing beauty, safety, and ambiance.